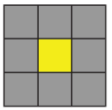


To learn to solve the Rubik's cube, you first have to learn the symbols that tell you how to turn it. The six faces are each represented by a letter. If the letter is just the plain, uppercase letter, and has no suffix, you turn that face 90° clockwise. These are the symbols:
When the face is followed by an apostrophe ' it means that you turn that face 90° counter-clockwise.
For example, R' would mean turn the right face counter-clockwise 90°. Additionally, if a turn is followed
by " 2 " such as " U2 ", you turn that face twice, or 180°. U2 would mean turn the up face (the top) twice.
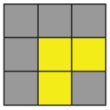
The last important symbol is lowercase letters. Lowercase letters signify double wide turns.
So, " r " would mean that you turn the right face and the inside slice adjacent to it. There might be more complex
notation later on, but just hover over it if you don't understand.
This guide is designed as a way to transition from the beginner method to the significantly faster CFOP. It covers the way to solve the entire cube. The current world record set in May 2018 with 4.22 seconds by Felix Zemdegs was done using CFOP, so if you practice a lot you can solve the cube under 5 seconds using this method. By eliminating the extra step of doing the corners and edges separately, you can get a lot faster times then with the beginners method. Additionally, it averages half the moves of the beginners method. (From 110 to 56 moves).
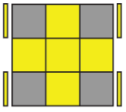
The objective of the cross is to make a plus sign, commonly referred to as the cross. You make the cross on the bottom so you don’t have to turn the cube over when you start F2L. You can choose any color to start off with, but the most common ones are white or yellow. The cross is a fully initiative step as there are so many possible scenarios. You can make any cross from 7 moves or less, you just have to train your mind to work on more than one edge piece at a time. It takes a lot of practice to go fast so don’t worry if you take a long time to do the cross, you will get used to it!
In F2L, you join the edge and corner piece, called the pair, and put it in the space where it goes, called the slot.
There are three ways to get the pair connected and two ways to put the pair in the slot.
First, you have to bring the edge and corner up in the top layer. Second, you pair the edge and corner.
Lastly, you insert the F2L pair into the slot and repeat the process three times. After you look at the cubes
on the left in depth, try to come up with the algorithms of the mirror situation without looking at the algorithm.
There are two ways to learn F2L. Intuitive F2L in which you learn the algorithms instead of
memorizing them and in algorithm F2L you have to memorize 44 algorithms. Doesn’t sound like fun, does it?
Use the below algorithms to help you understand each move and it’s mirror. If needed, go through the moves
on your cube slowly until you understand them. Do not memorize the algorithms. The whole point of intuitive
F2L is that there are no algorithms to memorize.
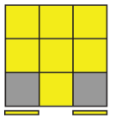
OLL is where you orientate all the top pieces so that all yellow stickers face up.
There are 57 total algorithms if you want to solve this in one step, but you can alternatively do two step OLL using
10 algorithms. In two step OLL, you make the yellow cross then orient the corners to make the full top face yellow.
I recommend learning two step OLL and maybe some easy to recognize full OLL cases.
This is how u PLL